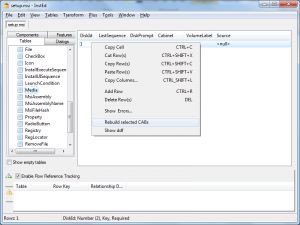
Today I faced a problem where I needed to replace one file in existing MSI package. I did not want to rebuild the package again from SVN using some branch or tag. So I was looking for some utility, which would allow me to replace a file in MSI with new version. There is an Orca utility in the Windows SDK, but doing such operation with it is quite tricky.
After some digging I found quite nice application on the internet which allows you rebuild cab files inside the MSI and so allows you to replace files. The application is called InstEd.
Download the free version and open it. It looks a bit similar to the Orca, but has more features. To replace file in a specified cab, you have to first put the files next to the MSI package using the same folder structure as defined in the MSI. Find file you would like to update and replace it. Then go to the Tables tab and select Media. Right click the cab, which contains the updated file and click Rebuild selected CABs. After replace is finished save the MSI and you are done.
Category Archives: Windows
RoboForm Opera Button
![0002-roboform-button-in-opera[7] 0002-roboform-button-in-opera[7]](http://www.romanstefko.com/wp-content/uploads/2010/10/0002-roboform-button-in-opera-5B7-5D_thumb-300x67.png)
RoboForm is one the best password management programs. It is integrated with the today’s most favorite internet browsers. Unfortunately there is no integration with Opera yet. Nevertheless there is one more supported way how to use RoboForm, without actually having RoboForm installed. It is called RoboFrom Bookmarklet. Basically it is a javascript which is called on the current site using a bookmark in your browser. When the bookmark is clicked, a RoboForm HTML window appears directly in the current site allowing you to fill forms based on your Passcards – to use this feature you have to have your Passcards synchronized using RoboForm Online service.
After some time of using RoboForm Bookmarklet in the Opera browser, you may find out that this way is not much convenient. At least it would be good to have the bookmark directly in the Opera toolbar. And that’s exactly what the RoboForm Opera Button provides.
Below is a link to the installation file. Installation itself is divided into two steps, which is caused by the Opera’s customization architecture. First step is installation of the additional button image into the Opera’s standard skin. This is done using the installer. After the installation is done (note that after the installation finishes, there are no files left on your PC – just the button) a customization web site is displayed in the Opera. The web site contains a link which will allow you to place the button in the position on the toolbar that suits your needs best.
Download RoboForm Opera Button